Tuesday, May 15, 2012

Rainbow Kuih Lapis

Photobucket

"Somewhere over the rainbow, way up high. There's a land that I dream of once in a lullabye". Each time I look at a Kueh Lapis, I would be reminded of this song from the Wizards of Oz. This is such a lovely traditional cake, made out of a mixture of rice flour/tapioca starch mixed into coconut milk and steamed one layer at a time. To be considered successful, you must be able to tear out the individual layers. If they stick to each other, then you will know immediately that the cake is a failure. I am really happy with how my Rainbow Kueh Lapis turned out and everyone whom I shared the cake with gave it a thumbs up for its nice springy texture. Nine layers of vibrant colorful sweet cake Photobucket Passed with Flying Colors Photobucket

Wednesday, October 26, 2011

Home Made Spicy Chorizos

I should and I must!

I have laid off blogging for quite a while now due to work that limits my time for enjoying my favorite hobby of baking and cooking. I have been so tired and utterly drained after each day at work. Three months back, I had a change of portfolio which enables me to squeeze in a bit of baking, cooking and attending culinary classes. One of them is a sausage making workshop which prompted me to make some myself.

If you have been following my blog, you will know that this is not the first time I am making sausages abeit a different kind. A couple of years back,I had attempted to make Chinese Sausages or Lap Cheong. It was fun but tedious at the same time as all I had was a funnel to feed the meat down the casing. It was a slow and laborious task. So I am so glad I invested in a sausage extruder attachment that works with my good ole Kenwood Major. It makes filling the hog casings a breeze and in a blink, they are ready to be twisted into links.

My first batch of Spicy Chorizos. There is nothing like biting into a freshly made, 100% wholesome sausage. There is no fillers and gritty bits like those you find in some prepacked sausages. Of course, gourmet sausages is a different species. You may pay a little more for the few links of sausage but the quality is so different.

The sausages are best eaten a day later to enable the casing to have a snap. If eaten immediately, the casing can be chewy and hard to bite through.

The spices that goes into the Chorizos
Photobucket

The seasoned sausage mix ready to go into the casings
Photobucket

Extrusion
Photobucket

Ready to do the twist
Photobucket

Com'on baby, let's do the twist
Photobucket

Twisted into the familiar links
Photobucket

Yummy Spicy Chorizo served with a cold beer
Photobucket

Monday, November 29, 2010

Dutch Apple Cake

Caught Rachel Allen on cable TV a couple of nights ago and she was teaching a bunch of students to bake this Dutch Apple Cake.

What attracted me was the way the butter and milk was incorporated into the eggs. The eggs and sugar was whisked to the usual figure of 8 stage and then the hot melted butter/milk misture was whisked in before the flour was folded in. Apple slices were then laid over the batter and sugar sprinkled over the top just before baking.

Photobucket
The only thing that 'went wrong' was that the apple slices did not sink to the bottom of the cake. Yes, it was supposed to sink into the batter and not sit prettily ontop of the baked cake. I do not know why? Perhaps my apple slices were too light or sliced apples were just contented to float happily on the spongy batter. Whatever the cause, the cake turned out very moist and buttery with a delicious hint of cinnamon.

Photobucket

Just for the fun of it. I packed some slices into these pretty Chinese Take Out boxes for the gang at the office.

Photobucket

A Baby Shower Cake

I have not decorated a fondant cake for ages. So when I received an invitation to a baby shower, I took the opportunity to make one. As I am no good in making fondant figurines. I dropped the idea of making fondant baby or cutesy teddies. The only thing that I am comfortable with in making is the baby bootees. I have made them several times and I was confident that although I have not made them for a long time, I would not have a problem doing so.

Here is my very simple Bootee Baby Shower Cake for Jing Ying, the adorable baby girl of my colleague.

The cake is a moist and fudgy chocolate cherry cake sandwiched with a cherry buttercream.
Photobucket

Photobucket

Photobucket

Tuesday, November 09, 2010

Caramelised Onion & Prosciutto Quiche

Is it an Onion Tart or is it an Onion Quiche. Anyway, it does not really matter so long as it tastes great.
Quiche; Onions; Eggs

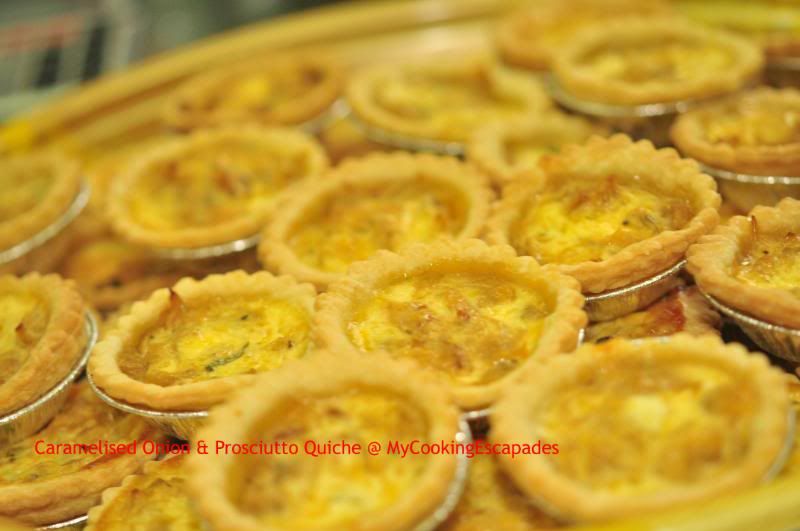
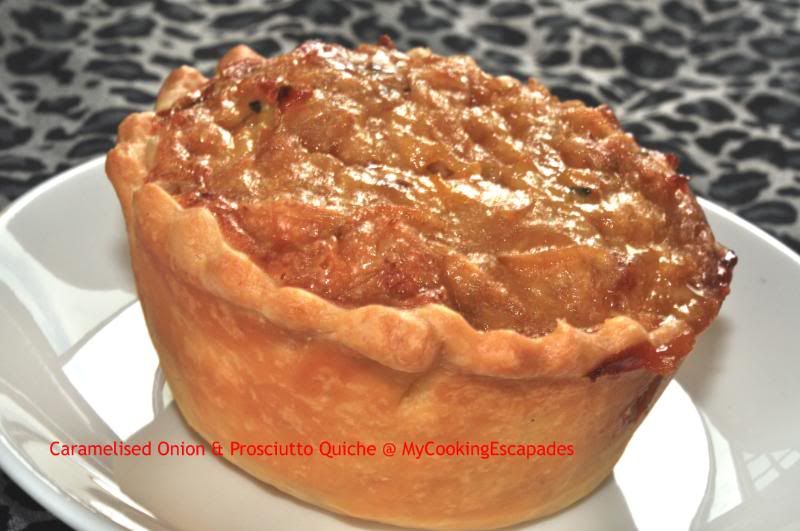
These tartletts are really good. It is an explosion of flavors ~ sweet from the caramelised onion, tangy from the sour cream and salty bits from the prosciutto ham. As I was making alot of the mini tarts/quiche for a party, I took the lazy way out by using store bought frozen shortcrust pastry, which have been pre-rolled. I am glad I 'cheated' as the rolled pastry is a cinch to use! Just defrost it slightly, cut out the rounds with a pastry cutter and then line the disposable foil cups.

Making the fillings is a bit more time consuming though as the onions needed to be sliced ever so thinly. It does not help that I tripled the recipe and so you can imagine how much my eyes teared as I laboriously slice away. Cooking the onions needed a bit of tender loving care as you have to stir it every so often to prevent sticking and burning. In fact, I did burned my onions black! I was attending to something else and have happily forgotten about the onions. By the time I remembered, a layer of onions had turned black at the bottom. I had to empty the nice onions onto a plate and then spent the next 20 minutes scrapping and srubbing at the pan before resuming the cooking. However, once the onions are caramelised, the rest is easy peasy.

This was made the next day, finishing up the balance onion fillings. This is when I decided to add some mustard to the fillings and I think it greatly enhanced the flavor too.
Quiche; Onions; Eggs

This is for you Joanna.

Caramelised Onion & Prosciutto Quiche

Ingredients for the Pastry:
185g plain flour
125g cold butter, chopped
1 egg yolk
1-2 tbsp icy cold water

Method:
1) Process flour and cold butter until crumby. Add the egg yolk and the cold water and process in short bursts until the mixture comes together.
2) Turn out onto tabletop and gather into a ball
3) Cover with plastic wrap and chill for 20 minutes

Ingredients for the Fillings:
800g onions, thinly sliced
75g butter
1 tbsp soft brown sugar
185ml sour cream
2 eggs
1 tsp dry Mustard powder (optional)
Pepper and sea salt to taste
50g Prosciutto, cut into strips
40g grated mature Cheddar cheese
2 tsp thyme leaves

Method:
1) Blanch the onions in boiling water for 2 mintues. Drain very well.
2) Melt butter in a pan and cook the onions over low heat for 25 minutes or until soft.
3) Add the brown sugar and cook for a further 15 miunutes, stirring occasionally to prevent burning. Onions are ready when they are a light toffee color.
4) Preheat oven to 200 deg C and grease a 22.5cm loose-based quiche/flan pan.
5) Roll out the pastry to fit the tin and trim off the excess using a sharp knife.
6) Cover base with baking paper and weigh it down with some baking beads or dry beans.
7) Bake the pastry blind for 15 minutes, remove paper and continue baking for a furter 5 minutes. Cool slightly.
8) Lightly beat the sour cream and eggs together, add the prosciutto, cheese and thyme leaves. Season with salt and pepper.
9) Fill the pastry shell with the mixture and bake for 40 minutes or unti set. If the pastry overbrowns, cover with foil.

Note:
1) I made them into mini tarts and skipped the step of baking the tartletts shell blind.
2) I just filled the uncooked shells with the fillings and bake for 20 to 25 minutes till fillings is set.

Sunday, September 26, 2010

Kahlua Souffle

The first time I had a Souffle was during lunch with my boss at the Les Amis French restaurant. That was like ten years ago. After that first time, I had the opportunity to lunch there a couple more times and each time, I would ask for the same souffle that was served with a light vanilla sauce.

I have heard alot of 'horror' stories about how intimidaing it can be to make one, the main setback being the souffle doesn't rise or collapsing the moment it leaves the oven.

Yesterday, I had the chance to learn how to make this from Chef Daniel Tay, the owner of Bakerzin, a very popular patisserie here in Singapore. After seeing how easy it was to make one, I plucked up enough courage to do it myself today.

What a sophisticated dessert? All with just 1 egg, 1 tablespoon each of sugar and Kahlua and a perfectly straight sided cup. What could be simpler and easier?
Photobucket

Photobucket

Saturday, September 18, 2010

Teochew Spiral Yam Mooncakes

I finally tried my hands at making this Teochew Spiral Yam (or Taro) Mooncakes.
Photobucket

I am pleased with the overall results and how the spirals turned out. The pastry is very crispy and slightly sweet. I do feel however, that it lacks a certain 'omph' in that it is very flat tasting possibily because it uses only shortening. It just lack the richness in taste from the store bought types. Perhaps a mixture of butter and shortening or pure lard would up the taste factor. Photobucket

The yam filling which is made from scratch is nice ~ not too sweet and a bit chunky as how I want it to be. The addition of shallot oil makes it very fragrant.
Photobucket

I made a total of 16 pieces.
Photobucket

These are two pieces failed me in terms of the spirals as the layers are too far apart.
Photobucket

I still have another 18 pieces of nicely rounded yam fillings waiting to be enrobed in pastry. I may just try another pastry recipe instead of using this same recipe.

Added on 19 Sept 2010 @ 4.30pm
I just made a second batch of the Spiral Mooncakes using a different recipe for the pastry. This pastry uses butter and has salt added. Texture while crispy, it is still 'short' and crumbly and has richness in taste I was looking for.
Photobucket

You can see that I am able to cut quite nicely through the pastry. I was not able to cut through Version 1 above as that pastry was too crispy. The moment I tried to press a knife through it, the whole pastry threatens to flatten and in the end, I tore it into halves with my fingers.

Photobucket

Saturday, September 11, 2010

Tea-Smoked Yellowtail Fish

Dinner tonight was Tea-Smoked Yellowtail Fish.

I was watching Food Trip with Todd English on the Asia Food Channel and Todd was preparing a meal of tea smoked fishes. It looked simple enough and without much fuss. I decided to try it for dinner and so popped over to the supermarket for the fishes. I chose two Yellowtail Fish, each about 22cm long and here is how it is made:

Tea-Smoked YellowTail Fish

Ingredients:
2 yellowtail fish (each about 22cm long)
100gm Demerara sugar
100gm tealeaves
100gm rice grains (dry, unwashed)
Salt & black pepper
Olive oil
Aluminium foil

Method:
1) Pat dry the fish and season with salt and pepper both inside and outside. Set aside.
2) Prepare the smoking mix by combining the Demerara sugar, tea leaves and rice grain together.
3) Place a heavy pan over high heat and lay large piece of aluminium foil to cover the entire base of the pan all the way up to the sides.
4) Pour the smoking mix onto the foil and spread it out well.

Fish

5) Place another piece of foil over the smoking mix and drizzle with olive oil and place the fish ontop. Drizzle with more olive oil.
Fish

6) Cover pan tightly with the lid and smoke the fish over high heat for 15-17 minutes.
Fish

7) Test with a chopstick for doneness. Serve fish with a wedge of lemon and some sauteed or roasted vegetables.
Fish

Although the smoke has permeated into the flesh, the fish was still moist and flaky, almost like a steamed fish but with a hint of smokiness.
Fish

This is how the smoking mix looks like after the heat treatment. Do not attempt to do this fish without laying the pan with alumimium foil otherwise your pan will be ruined.
Fish

Madeline & Madeleines

If you have read my last post, you would have known by now that my daughter Sylvia got married in April. She moved into her new home in Holland Village in July bringing with her most, well actually really only some, of her belongings. I am still trying to declutter her old room that has been stashed with her collection of books, toys, clothings etc etc collected over the years. It is like a mini Salvation Army store with some pretty good stuff that she doesn't want anymore and I am setting them aside for the charity.

Found amongst her books is this stack of Madeline theme kiddy invitation cards, serviettes and paper plates. I remembered buying this for her when she was eight years old. It was actually a box set consisting of the party invitations and a CD game relating the the adventures of a little French girl by the name of Madeline. I remembered Sylvia would spent hours intrigued by Madeline and learning a few French words and phrases along the way! The CD and box has long gone but she could not bear to use Madeline paper plates and serviettes and has been keeping them since.

Cakes

And this reminded me that I have a Madeleines tray somewhere. If my memory is correct, my brother bought me the tray some 4 years back but it has never been used. And so this was what prompted me to bake some Madeleines.

There are many versions of how this pretty scallop-shaped teacakes came about. I used a recipe from the The Australian Women's Weekly magazine and this is the brief one-para write-up on it:

"Legend has it that this recipe was developed by a peasant girl named Madeleine who lived outside the castle of Commercy, in a small village in Lorraine. The ruler at the time, Stanislaw Leszcyriski, was so taken by the cakes, he made them a part of the royal repertoire"
The Australian Women's Weekly, March 2010


Here are my baked Madeleines. What I like about this recipe is that it is not as sweet as the store bought ones as it has lemon juice added to it. It has a citrusy tang and fragrant with the addition lemon zests and also seeds from a whole vanilla bean.

Madeleines ~ What a perfect accompaniment to a nice cup of espresso!

Photobucket